Home / Blog
Building My Hugo Website as a Noob
With very little web development skills, I spent over 80 hours learning how to put my site together with Hugo and Netlify.
Table of contents
Why I left WordPress and GoDaddy
I used to host my site on GoDaddy while using WordPress as my CMS (content management system). One day, my WordPress theme broke and my site wasn’t working properly. Everything looked off and it was infuriating. I have struggled with WordPress for many years and I finally lost my patience.
When I had my first website built, I hired someone to help me put my website together and after that, I handled all the content management. I used WordPress + GoDaddy from 2016 until 2020. WordPress was a huge learning curve, it wasn’t intuitive and it was countless hours of trial and error.
I asked my network for recommendations on alternatives I could try. Will Chase talked about how his site was built with Hugo and deployed through Netlify. I didn’t understand a thing he said, so I Googled them. Despite working with Hugo for a bit now, I still don’t completely know what it is. I just understand enough to use it for my needs.
Hugo is a framework that builds static sites.
The introduction in this video explains what a static website is in simple terms:
There are tons of other static site generators out there, you might have heard of Jekyll or Gatsby. I chose to go with Hugo as a starting point. I don’t know the main benefits of it over other existing ones. Hugo is just what I hear about more often.
Netlify is a platform that builds my site live. The content of my site is built using Hugo, hosted on GitHub, then automatically deployed via Netlify. If I didn’t use Netlify, then all the content just sits on GitHub and isn’t published on the net.
When it comes to costs to owning a website, typically, you need to pay money for hosting and domain. WordPress is free to use, unless you purchase a paid theme. Initially with my old website, I paid for hosting and my domain through GoDaddy. I bought 2-year plans, if I calculated it to a monthly amount, I was paying CAD $10/month, this includes taxes. I used a free theme so I paid $0 for WordPress. Last year, I got more serious about SEO with my website and learned I needed to get an SSL certificate for my site. That was EXPENSIVE (I bought it via GoDaddy). It added an additional CAD $15 to my monthly total. I was on a multi-year plan, but it came down to about CAD $25/month. Geeez. I recently learned about Let’s Encrypt as an alternative if you don’t want to pay big bucks for a cerfiticate.
If you choose to use a website builder like Wix, Squarespace, or Webflow, then it might be costly and less flexible than if you went with WordPress. There seems to be an inverse relationship between time and money when it comes to building your own website. If you have more money than time, Wix/Squarespace/Webflow are your best bets. If you have more time than money, then you can consider WordPress, or GitHub Pages.
Hugo falls into the category of requiring more time than money, unless you hire someone. Hugo works with GitHub to host all the data, so that means it won’t cost you anything to host. Netlify is also free to use on the basic plan and it is more than enough for a personal website. That means the only cost is domain (which is about CAD $20/year). Even the SSL certificate is covered by Netlify via Let’s Encrypt.
Hugo is fantastic, but it can be a steep learning curve (I think I spent 80+ hours learning everything by myself, such as doing the research, watching YouTube videos, reading docs etc.). It definitely helps to have some web development background and a basic understanding of HTML and CSS. I googled W3Schools a lot to refresh my webdev knowledge.
Is Hugo for you?
There are three key questions to consider if this is for you:
- Do you have the time and patience to learn?
- Do you value flexibility and control over how the website looks and functions?
- Do you have any knowledge of web development and web design?
If you don’t have the time or patience but have about USD $12-15/month to spare, then I suggest Wix/Squarespace/Webflow. If you want something more in-between, try GitHub Pages or Wordpress.
Hugo allows for a lot of flexibility and control. But, this means to decide what that looks like, you need some knowledge of web development. If you have zero knowledge about web development and web design, then consider hiring someone to help you. Ask your network for people who you could hire.
If you have zero webdev knowledge, start learning what HTML and CSS is and understand how they work together. You don’t need to know everything about it, just the structure of it and their purposes. Having a high-level understanding of javascript will help too. If you have some webdev knowledge, but not much design knowledge, then study what makes a website look good. Pick a small handful of sites and observe why they feel a certain way. What makes them feel professional? How do they establish trust and credibility? Why do they use certain colours? It’s important that the interface of your site is good and allows people to use it with ease.
Resources to learn Hugo + Netlify
My recommendation is to follow online tutorials and just go along with every step. Don’t try to read too much into the documentation that explains how everything works. Get your hands dirty and learn as you break things. I am not kidding when I say I have never done this before. I struggled to learn how to open the terminal until a couple of weeks into it. All the tutorials I watched skip this step. They all just go into it and not explain the context of what’s happening. As a total newb, I struggled to understand context.
These two YouTube tutorials have been helpful. I used a mix of both. There is more than one way to do things. It’s helpful to be aware of them in case one solution offered doesn’t work.
- Hugo tutorial by Mike Dane on YouTube: When following along with this tutorial, use a text editor with a terminal. I recommend Visual Studio Code.
- Create a website with Hugo by Chris Stayte on YouTube
There’s also a lot of documentation on Hugo. You probably won’t understand these right away. I had to read some of them 5-10 times to understand them. They aren’t very detailed and not beginner-friendly. So don’t be discouraged if you don’t understand them right away.
If you want to save more time and have less hassle, then you can follow this video. It uses Forestry as the interface to manage your content. Although, keep in mind that it might mean you will have less customization of how the site looks. Forestry only allows you to manage the content and use themes right out of the box. If you approach building the site with the above two YouTube tutorials, you will have a better understanding of how to customize the site and have more control over how it looks.
The rest of this blog post is helpful if you are going to develop your site locally on your desktop, rather than through Forestry.
Supporting developers
On a side note, I was so thankful that the developer who created this theme allowed people to use it for free. I went out of my way to find them on Twitter to thank them and asked if they accepted one-time payments. It was my way of showing my appreciation. They asked me to sign up for a paid service they provided. It’s called Pixelarity and it’s a subscription-based service. I signed up and also offered to spread the word about it. Check it out if you need templates for your new site. These can be converted to be used with Hugo. This post might be helpful to do that.
If you have the means to support a developer’s work financially, please do. Some developers have online tip jars through Ko-Fi, Buy Me a Coffee, PayPal, or Venmo. Supporting developers doesn’t have to cost much: you can share their work, give attribution to them on your site, or send them an e-mail to thank them.
What worked for me
I’ll briefly list out what worked for me when building my site. I am not an expert in this at all, I just learned about this a couple months ago and I am still learning it. I am only sharing what I know (which is still limited). The following is helpful to help you get started. I find that hardest thing about doing anything is getting started. I don’t go into the details of what to do afterwards, the YouTube videos I recommended can help you through that.
Keep in mind this guide is only for Windows. Remember that there is more than one way to do something, the way I did it doesn’t mean it would work for you.
Installing stuff
Here’s what I installed to get started (free to download):
I later learned that installing these additional applications helped make workflow a lot more efficient (free to download):
In addition, you need to create an account for the following:
Getting started with Hugo
I installed Hugo via Chocolatey. Search “Windows PowerShell” from your start menu, make sure you “Run as Administrator”. Then you just type/paste:
choco install hugo
And that’s it.
Creating a new site, installing a Hugo theme
Hugo has a quick start guide you can reference as I show you how to install a theme.
It’s time to build a site and pick a theme. There are hundreds of themes free to use. Remember, everything lives on GitHub. If you have no familiarity with it, don’t worry, as you interact with it more, it will become more familiar. When you download a theme, it’s not something you can ‘install’. When I was trying to install a theme, I thought it would download something and I just click ‘run’, like a software. No, that’s not how this worked. One thing to keep in mind is that everything you will do is local on your machine. This means you can use any folder anywhere on your computer to start building your site. Personally, I made a folder in “Documents” just for this. Later when you are ready to connect the site to GitHub, it will in the “GitHub” folder.
I probably made more than 10 Hugo sites through a lot of trial and error. Sometimes when I knew I screwed up, I would start over and go through the process to retrace my steps. I had a lot of practice just by repeating steps over and over again. I also better understood what I was doing and why.
Create a folder called “Hugo site”. Open this folder, right-click and click “Git Bash here”.
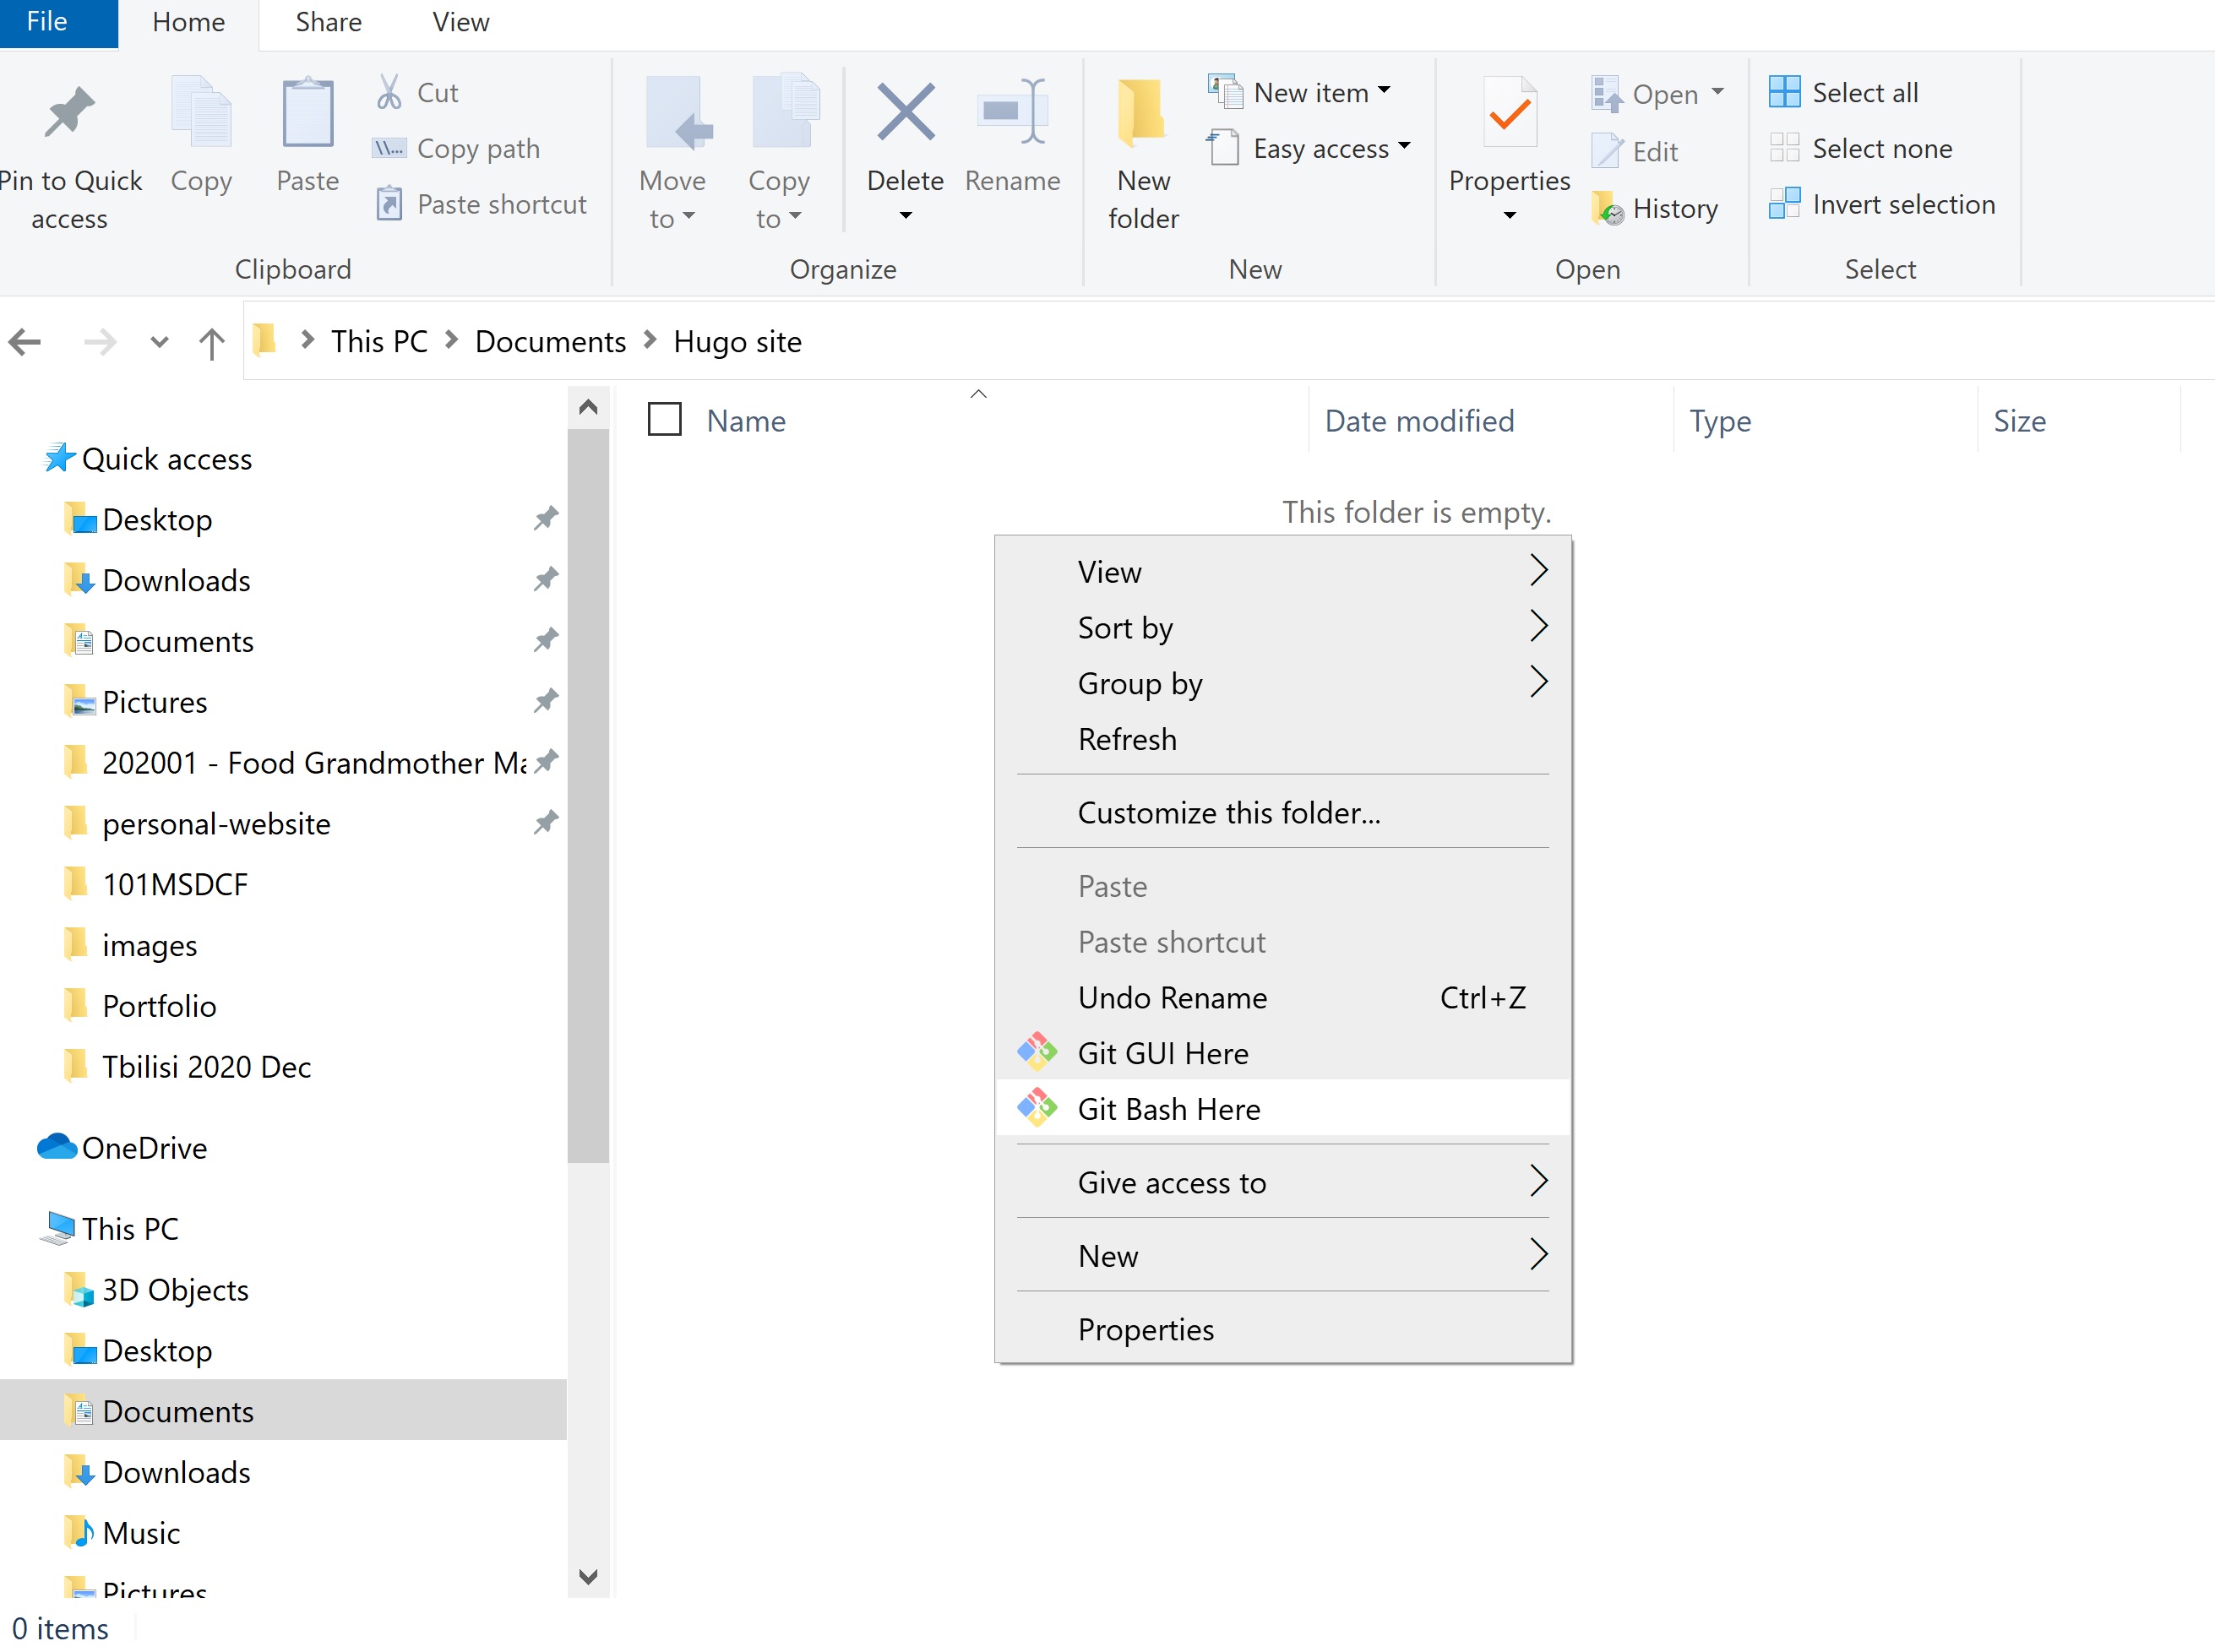
From here, you will create a new directory, aka your new site. Then type in the following command into Git Bash:
hugo new site name-of-site
Replace “name-of-site” with your site name. A new folder will emerge and it will contain several folders. This is the structure of the entire site. Everything will live here.
In Git Bash, type:
cd name-of-site
What this does is moves you into the folder of the site and your following commands will affect this folder. “cd” is how you “change directory”. It changes the folder you are are working it. So now, you are in your main Hugo site folder.
Pick a theme and follow the installation instructions as per the theme. I learned the hard way there were multiple ways to install a theme by reading the “Read Me” section. Personally, the instructions from this theme worked for me, nothing else worked. This theme is called Papermod, it’s got great documentation detailing a lot of information. It’s useful to go through them even if you aren’t using this theme.
Teachable moment: Read the “Read Me” section of Hugo themes to better understand how to install and use them. Lots of the creators put the time to write these out to help you. They might also answer frequently asked questions. I didn’t read them at first and later realized how helpful they were.
When installing a Hugo theme, I struggled to get it to work properly with Netlify. So, I had to install it as a submodule. While you still have Git Bash open, type:
git init
Then, to install as a submodule,
git submodule add https://github.com/budparr/gohugo-theme-ananke.git themes/ananke
- https://github.com/budparr/gohugo-theme-ananke.git: This is taken from the URL of the github where the theme is located. So if you go to pick a theme, then click on a theme, click on “Download”. This will take you to GitHub. Copy the URL.
- themes/ananke: You only need to update the “ananke” part with the theme of your choice. Use the same name as the theme.
According to the rest of the instructions here, type in:
git submodule update --init --recursive
git submodule update --remote --merge
Now, go to themes>theme folder>exampleSite, copy everything here and go back to the main folder and paste what you copied.
In GitBash, type “hugo server”. Open up a web browser, and type into the URL bar “localhost:1313”. The website should appear.
Quick recap:
- Create a new folder anywhere on your computer
- Right-click, click “Git Bash Here”
- Type “hugo new site name-of-site”
- Type “cd name-of-site”
- Type “git init”
- Type “git submodule add https://github.com/budparr/gohugo-theme-ananke.git themes/ananke”. Replace the link and theme name with the theme of your choice.
- Once the theme is installed, type “git submodule update –init –recursive”
- Type “git submodule update –remote –merge”.
- Copy the contents from the “exampleSite folder”, paste to main folder
- Run the site locally with command “hugo server” on GitBash
- View the site on web browser by typing in “localhost:1313”
And that’s all there is to it. Try different themes, do this maybe 5 times. Once you get the hang of it, it will make more sense. I think it’s helpful to try different themes because every theme will be different. You will be exposed to how different people write documentation and learn different ways to work with Hugo. Here’s a list of themes I think are good to use and study. Why not install them all? Go through them and read the “Read Me” section.
- PaperMod: Simple blog post with thorough documentation.
- Hero: I copied their code on leaf bundles. Super helpful.
- Hargo: Very clean site for e-commerce.
- Kross: Colourful and has a strong portfolio feel.
- Serif: Agency template great for businesses.
- Forty: I modified this theme for my current site. Demo seems to not work on Hugo’s website, so check it out here instead.
I recommend you follow-up with this video. He talks about the structure of a Hugo site.
Broad general help
Here are some things that I had challenges with that might be helpful if you need help troubleshooting. This might be too advanced, so don’t worry if you can’t follow along.
Questions to ask yourself when designing a site
I have some experience designing websites, I have done them for my past clients and I have spent a couple of years wrestling with WordPress. Designing a good website requires you to think a little bit about strategy. What is the goal of the website? Who is your target audience? What content will you show? How do you direct people to your content?
My website is designed as a personal site that showcases my work. My goal is to show people my process and how I think about problems. I want to portray myself as someone who solves problems through visual design. I am very clear about what I do and what I don’t do. I try to keep the language approachable and avoid jargon where possible.
Here’s a short list of questions to consider when designing your website:
- Why are you building a site?
- How will you use the site? Do you want to convert people to sign up for your newsletter? Perhaps you want people to read your blog posts. Maybe you want to make a sale in your shop?
- Who is your target audience? You can have more than one. Be specific and think about why they would visit your website. What are they hoping to learn and how would it better their life?
- What is your ideal website? What is possible to make at the moment? If there is a large gap between the two, break the process into phases.
- What are the key pages you want to have? (e.g. work, contact, about, news, etc.)
- What are examples of other websites you want your site to look like? Two sites that guided my design was Pentagram and Shantell Martin. I studied how they structured their content.
Keep a log early in the process
Chances are it will take you more than a day to figure this out. Whenever I was done a session working on my site, I would write down what I did and where I left off. I kept track of this because I don’t always come back to it the next day. It might be in a couple days. And by then, I would forget everything I did to that point. As a result, I am more likely to procrastinate. Writing down where I left off helped me remember what I learned and it helped me transition into working on my site.
Also, I kept track of useful things I learned. I write mini tutorials or keep track of helpful links. Learning something new takes time. And I needed reminders. Say if I finally figured out how to update an image on a page, and it took me a long time to figure out. I’ll make a note so I remember how I did it.
How to troubleshoot problems
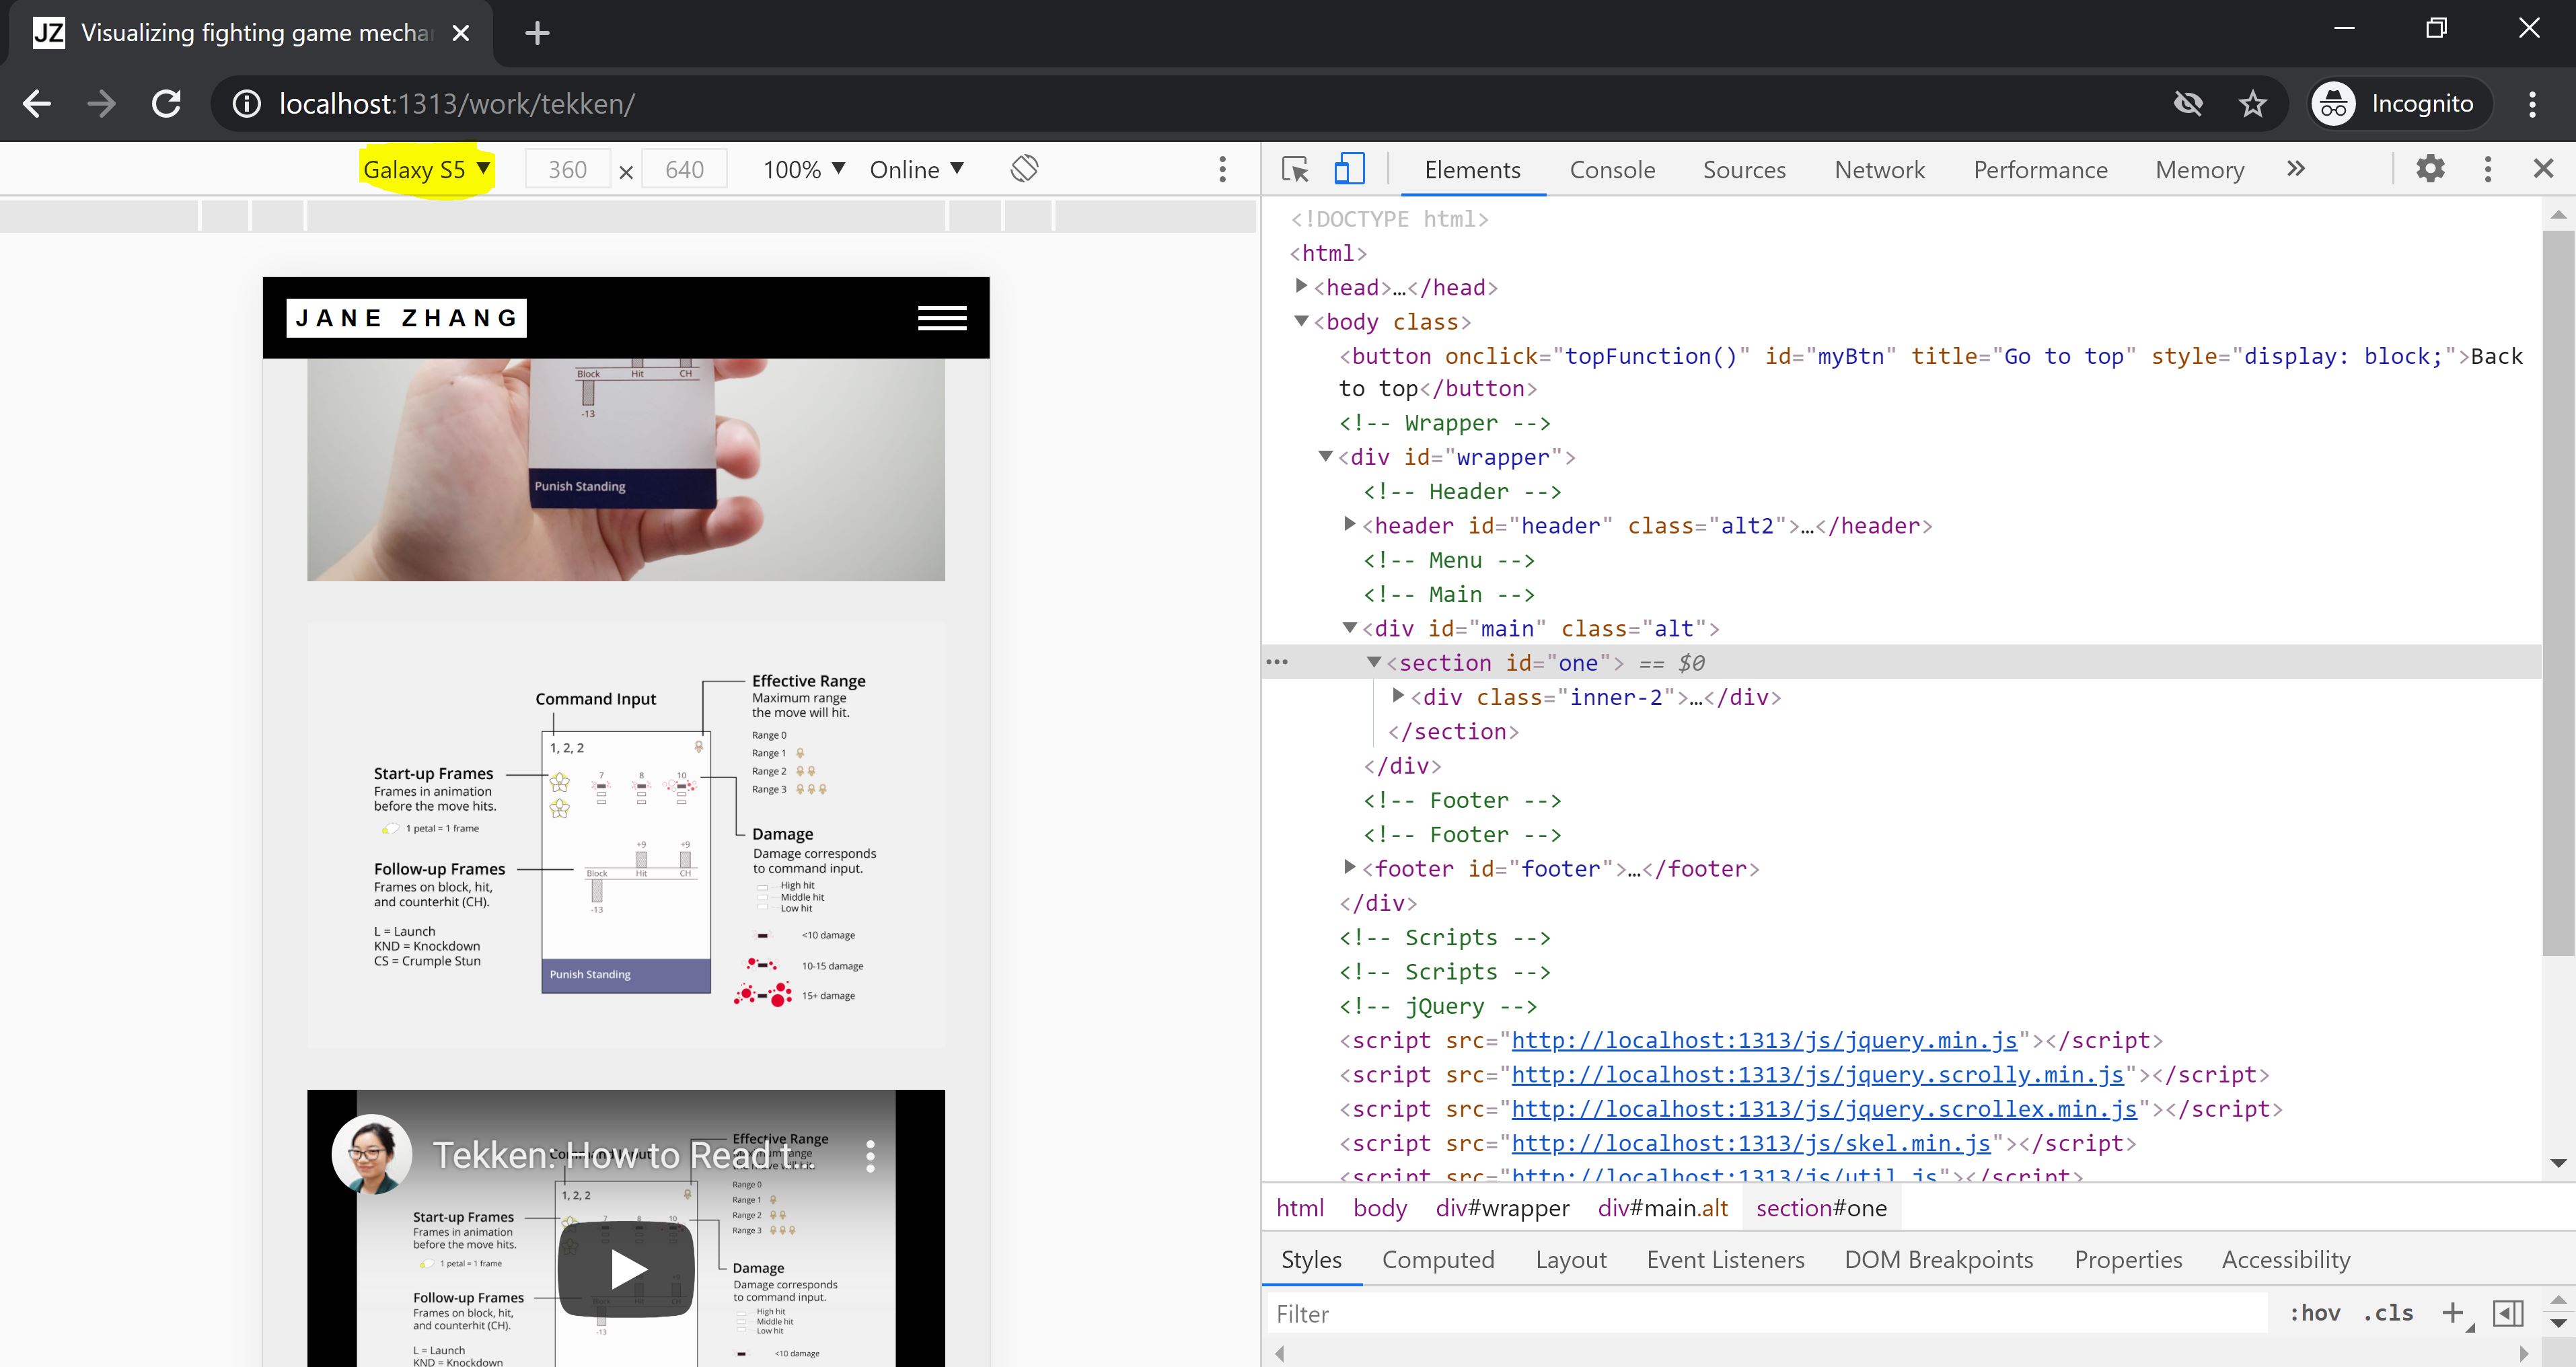
A helpful way to check how the code is rendering is to use “Inspect”. As you are running the site and checking it on “localhost:1313”. In your web browser, right-click on the section you are working through on the site, click on “Inspect”. It will show how the code populates. This has been very helpful when I am inserting links and need to check how it shows up. Inspect is also a good way to test for responsiveness (how a site displays on different types of devices, e.g. desktop, mobile phone, tablet). You can check how your site displays on mobile. At the top bar, there’s a drop-down, click on the device you want to view your site. If it’s responsive, the content would fit within your screen properly.
Getting unstuck
I got stuck many, many, many, many times. During those times, I wanted to give up. The first time was installing a theme. Nothing worked. I looked up a lot of forums and read many personal blogs for help. I took a break for a few weeks and came back to it. I installed other themes and had a better understanding of the underlying mechanics of Hugo. Eventually, I learned what was going on and was able to do it. The best ways to help you overcome challenges are:
- Google everything: many forums and personal blogs will offer small tips that can help you overcome your block. Change how you type your question if you aren’t getting results you are looking for. Keywords matter.
- Break the code: trial and error everything. Remove a block of code and see what happens. You will learn its function in this way.
- Copy and paste code from other themes: I did this a couple of times and some have worked really well for me. It’s helpful to study what other people have done. Read their documentation.
- Write down possible steps: I get overwhelmed very easily and I find writing them down to be a good way to deal with them. If I am ever stuck, I come up with 2-3 possible things I could try. As I try them, I tick them off. What usually happens is one of them would get me somewhere that makes progress. The hardest thing about moving forward is being paralyzed and not making a choice on what to do. These thoughts get stuck in our head as we ponder if they would work or not. Writing them down enables me to act on them.
- Take a break: sounds cliche, but it works. I spent an hour working through something. Gave up, stood up, went to use the washroom, then as I was sitting on my toilet, I realized what I did wrong. Life is strange.
- Ask for help: here’s the forum for Hugo.
I have zero, big fat hairy zero experience building websites with code. I barely code at all. I know a bit of HTML and CSS. And it’s just enough for me to know what it is. I had a lot of blocks, even up until the very end when I was publishing the site. Right at the last step, I couldn’t figure out how to deploy it to Netlify properly. It was failing to build for some reason. Every time I had a dilemma like this, I came up with several ways to approach it. It would be one of the things from the list above.
I always overcame my obstacles with the mentality that human beings can do anything they want, anything is possible. I’d often question “is it possible to make the site look this way?”, and I always answer it with “yes, it is. I’ve seen crazier websites, I am sure I can figure it out”. So I push through knowing there is a way. Humans can make anything possible, as long as we can imagine it, we can do it. Worse case scenario, I always had the option to hire someone to help me if all else failed. I was lucky that everything worked out.
I had the mentality that I didn’t need to understand what I was doing. As long as I could get some things to work, a little at a time, then I could figure it out.
Teachable moment: You don’t need to understand everything that you’re doing. Take it slow, start small, and build momentum from there. Slowly as you practice and work with the code, things will make sense. It will take time. Approach this with a mentality of patience.
Breaking it down in phases
I am surprised that I was able to adopt a perspective of building the website in phases. I have a very stubborn perfectionistic personality where I want everything done all at the same time. It’s an incredibly unrealistic way to live. Over the past couple of years (with help from therapy), I was able to get out of that kind of thinking and get more things done in life.
I had a lot of ideas for the website. I was ambitious in what I wanted to include. But, I held myself back and forced myself to think about it in phases. The first phase was to get the site working and live, even if it didn’t look how I wanted it to. The next would be to slowly add the things I wanted. Little by little. Adding my past work, transferring my blog posts over, updating the the colours. Everything was done little by little. When I was thinking about optimizing some part, I would put it on hold if it wasn’t urgent. If I don’t need to get it done now, then I could get to it once the time comes.
Teachable moment: Consider what the MVP (minimum viable product) would look like, what is the bare minimum you expect from your site? Of course, have your ideal state in sight as well, but work towards something that would act as a prototype of your site. It’s more important to have something made so you can build and improve on it, than aim for something ‘perfect’.
Building this website was almost like a lesson on financial investment. In terms of money, cash on hand is the most valuable thing for a person. It’s why Costco is so profitable. They can get more cash in hand earlier by selling more at a time. At any moment in life, I have limited hours per day to spend. Instead of spending it on a problem that doesn’t need to be solved now, I can solve it 6 months later when it does become more relevant. Similarly, the time we have on hand now is important. Use it wisely and don’t squander it. If it can be used at a later time, then wait.
Optimizing the website with PageSpeed
I also wanted to make sure my site was optimized for speed. I’ve had my site checked via PageSpeed. If you load your page into it, it would provide suggestions on ways to improve performance. The recommendations for my site were to adjust the size of images and remove unused javascript. Which I did. I also converted images on my home page to .webp, which loads faster than .jpg images. Possibly due to how it gets compressed. I use XnView MP to convert my images.
Workflow, how I update content on my site
This is what my workflow looks like if I am creating a new blog post. There’s probably a easier way to do all this, but this is what works best for me:
- I go to the main folder of my Hugo site on that’s connected to GitHub, right-click, click on “Git Bash Here”
- Type “hugo new posts/6.newpost/index.md” (I number the folder of each post so it’s organized. What this command does is creates a new leaf bundle)
- In Git Bash, type “code .” to open the folder in visual studio code
- In Git Bash, type “hugo server -D” to run the site (note, if you run hugo server with the “-D” at the end, it allows you to view posts that are still drafts)
- Open web browser and enter “localhost:1313” into the URL bar
- Update the content via visual studio code, save changes (ctrl+s)
- When ready to have the changes published, open GitHub Desktop, write the summary, click on “Commit to master”. Then click “Push origin” (at this point, my changes are pushed to GitHub, Netlify detects these changes and automatically builds the site with the updates)
- Disconnect the site locally, hit “ctrl+c” on Git Bash
- Double check the changes on site look good live
Specific detailed help
This is very specific, and only useful once you’ve bulilt your site. I include this here because I had a lot of challenges that I couldn’t find answers to. Maybe you might encounter these and my way of addressing them would help you.
Why isn’t the main.css file updating?
Main.css is what it sounds like, it’s where your main css file lives, and it is a master of how your entire site is styled (such as fonts, font sizes, colour, header spacing, line height…everything!). When updating the “main.css” (usually found in themes > static) file, changes might not reflect right away when previewing with “localhost:1313”. I would for example update the font colour or background colour and nothing shows up. What I do is I open an incognito browser and the updates show up. If I was already on incognito and it doesn’t work, then I open a normal browser to check. I do not know why it does this. But after finding out, it was a huge relief. Nothing updating or showing up made me think I was updating the wrong file.
When I deploy on Netlify, it doesn’t show up properly
There are many reasons why this isn’t working. It could be how you installed the theme or it could be something else. For me the biggest reason first was making sure I installed the Hugo theme as a submodule.
The second problem I faced was updating the URL. It was very important to update the “baseURL” in the config file. When starting a new site on Netlify, they give you a default Netlify domain. Copy that doamin and update that to the config file so everything renders properly. If you end up buying a domain, update the the config file with the one you bought.
Why page bundles are life savers
These are life savers. My site uses leaf bundles and honestly, it saves a lot of time. Hero uses them with shortcodes and I copied the same code into my site. This is by far the best resource on Page bundles, written by Regis Philibert. I read this blog 10 times before I understood it. The post mainly talks about Resources, but it has a helpful intro to why page bundles are useful. Hugo also has a lengthy documentation on page bundles.
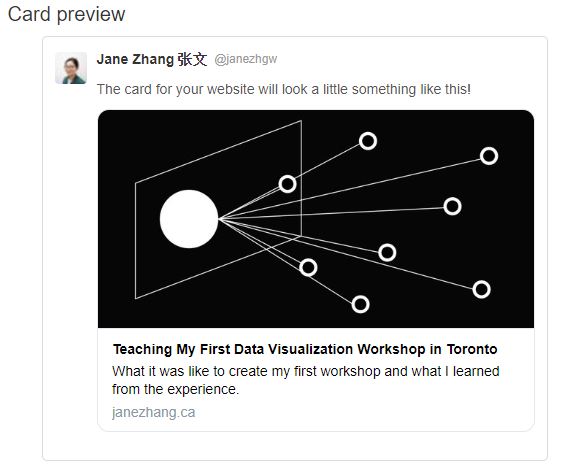
Why doesn’t an image show up when I share a post on social media?
This was something I struggled with at the very end. When I had a blog post written and I was ready to share it on Twitter, the image didn’t show up. It was just text. You can test out how your link will preview with a card validator.
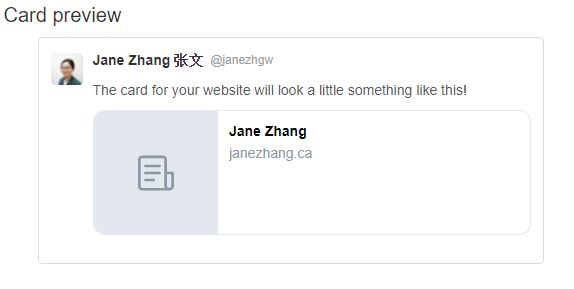
I inserted a code into the header partial I found from a very helpful post by Justin Duke. It was clear in explaining how the cards worked.
Coming from WordPress, I took so much for granted. All the plugins that were available to me made a lot of things like this easy. Now that I am mostly building this site on my own, there’s so much more to it than it looks.
What is markdown?
The writing is all done in markdown. It is a way to format your text without using lengthy HTML. With Hugo, there are many ways to incorporate HTML without it getting too bulky.
For example, in HTML, I would hyperlink like this:
<a href="https://www.w3schools.com">Visit W3Schools</a>
In markdown, I could do it like this:
[https://www.w3schools.com](Visit W3Schools)
Markdown was meant to be easy on the eyes. Markdown is quite easy to pick up. Here’s a fun markdown tutorial I found helpful.
With markdown, you could incorporate shortcodes in Hugo to leverage the flexibility of HTML and CSS.
How can I use an existing domain?
My domain is with GoDaddy. To apply it to my new site, I had to follow this process. Don’t fret if your domain isn’t working right away, it does take up to 24 hours.
Creating forms with Netlify
If you want to create a contact form on your site, Netlify provides forms free to use. A submitted form is automatically forwarded to your e-mail. Handy!
A living, breathing entity
I am far from “done” with building my site. I have more ideas to optimize it such as adding a “related content” section under each blog post, restructuring the layout, or thinking more about content strategy. I view my site like a resume, it’s something that gets constantly updated. It is alive and evolves as I learn and grow. I see many ways for my site to grow in the near future. I hope this post was helpful. If you have questions, feel free to comment below this post or e-mail me. I’ll do my best to answer your question or direct you to the right resources.